
Author’s Note: This chapter is named with tongue in cheek, but also in respectful memory of the late, great, Jennie Alexander, author of How To Make a Chair From a Tree and coauthor of How To Make a Joint Stool from a Tree, who passed away recently. Though I’m not a chair maker, these two books were my introduction to working wood in the green state and were seminal works in my development as a period woodworker. I’ll use green wood to make a couple of these as soon as I’m able to locate some. (Eyes the neighbor’s cherry trees with a speculative eye.)
You might recall that I attempted a three-footed turned stool awhile back and failed miserably. It was one of those times when things went wrong at every turn and I ended up spending a couple of days making elaborate firewood.
I was ready to chuck it all and go back to baking or pinmaking or something.
My wife — ever the practical engineer — reminded me that a wise tailor start with a toile, making the first pass at a new pattern in a cheaper fabric as a proof of fit and concept. In engineering, this is done with rapid prototyping or 3D printing, and in woodworking, with cheap pine, or whatever you have lying around.
You’ve heard me say this before; this is why I made that document box out of pine awhile back. (I’ll eventually get back to that, I promise.)
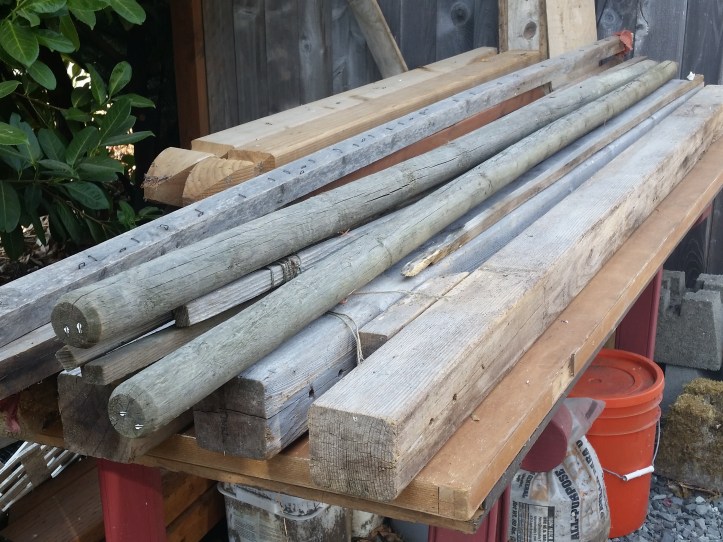
The Engineer and I just recently moved and we took down an arbor in the back garden of the old house to make the place more attractive to buyers. As our first Postmaster General once said: Waste not want not, so I salvaged the usable wood. Some of it’s already round, so let’s throw it on the lathe to clean it up, and very carefully make ourselves a stool.
To refresh our memories: These triangle stools were a mainstay of commoner furniture from the 1500s to the mid-1600’s and appear in most contemporary images of commonfolk. They are especially prevalent in the genre paintings of the low countries, though the number of images depicting commoners are uncommon outside of that area, so there’s distribution error in that statistic.
This is Christ’s foot, resting on such a stool in the painting Christ in the House of Martha and Mary by Pieter Aertsen, from 1553 via Wikimedia Commons.

Unless the other beardy guy in the background is Jesus. Who knows?
I’m sure my old art history teacher would admonish me that the three-sided stool was chosen to reflect the Holy Trinity, and well it might have been in this case, but Aertsen painted widely and not always with parable or allegorical intent. His depictions of markets and kitchens depicting commoners about their daily business. And in most of his paintings you will find our stool. I chose this particular image because it’s one of the clearest images which depict the peculiar joinery used to assemble these stools. Notice the round tenon and the rectangular tenon at the top of the legs. Also notice that the stretchers are each at a slightly different height; that will bedevil us later.
For a refresher on the basics of mortise and tenon joinery, you can revisit Doing Time in the Joint: Introducing the Worshipful Company of Joiners where we introduced and cut our first mortises or click here for a mortise & tenon video by Paul Sellars.
The rails at the top of the stool, in which the seat is inset, interfere with each other, by which I mean the mortises cross, so the tenons must do so as well. The clever bit is that the nameless inventor of this piece of furniture solved that problem by making a smaller round tenon that could pierce the rectangular tenon without appreciably weakening it.
What a simple, elegant, solution… and what a royal pain in the derrière to execute.
")

Cut list:
- three legs
- three rails
- three stretchers
Cut three rails, three legs, and three stretchers, plus as many spindles as you want (I cut none, paintings show as many as three per side.)
Choose clear stock, or at least cut around any knots that might complicate cutting joinery. Turn the legs to the fattest dimension possible given your wood choice. At least 2 1/2 inches is advisable.

When you turn your rails, leave one end of each rail square. Peter Follansbee doesn’t do this and I don’t know if it’s a period methodology, but you’ll be glad that you did. The square end will (eventually) be your rectangular tenon end. Leaving it square will help when you’re at the bench trying to plow a groove into the inside face of this thing and will also make cutting that rectangular tenon easier.
Turn a round tenon into the other end of each rail, leaving enough length to cut off after assembly (diameter of the chair leg, plus at least an inch). You’ll be thankful for the extra length later when you’re trying to slot that seat into the groove.

Note: Decorate your turnings as you desire, but remember: at least in the stool form, this is simple furniture, so restrain yourself. If you want to extrapolate into a ridiculously uncomfortable-looking chair, go nuts. For me, a few decorative grooves or wire-burns is plenty.
Wait… how big?
Um… Scott, you didn’t give any fixed dimensions back there.
If you look at the artwork, these things come in all sizes and are often used as tables. So the crucial dimension isn’t height, width, or diameter. Your posts have enough meat to accept those crossed tenons and not shatter (let’s say the width of your mortise, plus a half inch on either side) and the diameter of the rail has to be big enough to accept a groove for the seat to ride in. Beyond those concerns, you can expand or contract to suit your desires and derrière within reason. I reckon that wider spans will require wider diameters of a harder, straighter-grained wood to keep you from bowing the seat out of the groove.
Experiment and tell me how it goes.
My finished stool is 17 inches tall. My rails (including tenons) started at 19 inches in length, so I could cut the tenons long, extending through the posts and giving me plenty of extra to cut flush to achieve a final outside width of 17.5 inches. I’m tall and I have a pretty narrow butt, so those dimensions suit me.
The Terrible Triangle Tenons
Time to cut your tenons and this was the first hurdle I encountered when developing this project.
Each of the rails has a round tenon at one end and a rectangular tenon at the other. You turned that round tenon when you were still on the lathe. My round tenon was a 1/2 inch. Because you left the square end square, you have that nice square edge to register against when you mark your rectangular tenon.
Remove only one cheek of the tenon. Seriously. This will get it out of the way of your plough plane (or router) when you’re cutting that groove for the seat.


You have a round tenon end and a square end with one cheek removed. That removed cheek means that is now your groovy side for the seat. At this point, our seat rail is no longer interchangeable, removing that cheek of the tenon has defined your up and down.
Secure the tenon to your bench with a wagon vise or similar arrangement and go sharpen your plough plane. It’s time to cut the groove for the seat.
(continued in part two)
Works Cited
Three Legged Turned Chair, Popular Woodworking, Art & Mysteries column Follansbee; published 16 January 2011 (Accessed 23 August 2018)
The Troublesome Triangle Stool The Woodwright’s Shop, with Roy Underhill, UNC, PBS, Broadcast 6 September 2012, Season 32, Episode 7
Three Footed Turned Stool 24 July 2016; Information about general construction
A Lot of Photos of the 3-Legged Stool Assembly 06 July 2016; Instrumental in understanding how the seat… um… seats.) by Peter Follansbee, Joiner’s Notes (blog)
A Pinterest page of nothing but triangle stools, curated by yours truly. (Notice how many are being used as little tables versus how many are seating.)
Headline image Credit
Men Shoveling Chairs (Scupstoel), Circle of Rogier van der Weyden, possibly Vranke van der Stockt (Netherlandish, ca. 1420–1495), Public Domain image via the Metropolitan Museum of Art, NYC
