
Long ago, the comments and responses to my work taught me that a not-insignificant number of my readers see my experiments as interesting, but even most of the reenactors simply don’t see my approach as practical. Take pinning, for instance: If you need a hundred pins for a lacemaking demonstration, making each individually and by hand just doesn’t feel like a good use of time when you really should be putting that effort into perfecting your lace. So they buy some ‘close enough’ pins and carry on.
Many of you, I’ve been told, point out the anachronism to onlookers and a blessed few of you then point them to my work to demonstrate how the real pins would look. That’s perfectly fine, by the way; I’m not here to shame anyone. I do this for personal enlightenment and I’m not expecting others to join me in the rabbit hole.
Maximum Effort for Minimal Gain
I’ve said it before, but one of the reasons the pinners fascinate me so is they are the bottom rung of the artisanal ladder. They found it so impossible to get ahead because either their suppliers owned them or those they supplied gave them no respect. Often both at once. Creating the most simple thing in the world, a pin, was so laborious and time-consuming that they could never hope to get ahead of their costs. They are perfectly emblematic of how stagnant the bottom of the Tudor foodchain really was.
In our modern world, putting that much effort into that little gain makes no sense. We have other things we need to do, Scott, and we’re not going to be demonstrating this ‘on stage’ — can’t you show us a modern way to make pins?
If this was a YouTube video, it would look like this…
Opening scene: Fade in
A fully-attired Elizabethan man is standing in a parking lot.
Title Card: The 21st Century Tudor tries Pinning
The man walks forward and through the door of a fabric store. Walks to a display of sewing notions, selects a box of sewing pins, pays and leaves.
Scene.
Roll credits.
Okay, that’s a bit snarky and it doesn’t get a modern reenactor the pile of pins appropriate for demonstrating sewing/lacemaking to a modern audience. Period sewing demos with modern head pins just doesn’t feel right, and for what it’s worth, I really am here to help.
It also occurs to me that completely setting aside the time commitment and tools required, not everyone has the hand strength or eyesight necessary to do some of the more fiddly work, but might still need to make themselves some pins.
Also, I think it would be interesting to compare and contrast the speed of individual production for the Tudor artisan and the modern craftsperson.
So here we go, let’s get the 21st Century Tudor a pile of pins that will look period even if we’re using modern tools to make them.
Pinning in the 21st Century
Supplies:
- Electric drill
Note: A drill with a plug is better for this task, and a drill press is best of all. If you have neither, cordless is okay but you will be cycling through batteries surprisingly quickly, so keep your charger close at hand. - Hammer
- Leather work gloves
- Eye protection (safety first!)
- Bench block + steel table/anvil* or two bench blocks
- Brass music wire of the desired gauge (I used 16 to start with)
- Soft brass spool wire of a smaller gauge than your music wire
- Wire/bolt cutters
- Lead-free solder
- Brazing torch or other heat source
- Appropriate size crimping pliers
- 80/120/220 sandpaper
Optional
- 10k grit wet/dry sandpaper (for polishing)
- Extra-fine file for fine-tuning
Needless to say all this is all to be undertaken at your own risk. Spinning drills, sanders, cutters… be careful! Restrain your hair, tuck in the ties of your hoody, wear a leather apron and eye protection… power tools can hurt you.
We like you. Please don’t hurt you. Thanks.
We start out very similarly to the way the period pinners began their craft and then diverge mostly at the sharpening stages.
Step one:
Measure out and cut your pin shafts using the music wire. Music wire is often sold in flat lengths rather than on the spool, so you won’t need to straighten it, which saves a lot of time.

Try to keep a consistent length and cut straight across instead of at an angle. (A straight cut doesn’t have to be corrected later and saves time in the sharpening stage.)
This is all fiddly work even without using the bone to do it, so if you have reading glasses or magnifiers, you might want to go get them.

Step Two:
Chuck a short length of the same music wire into your drill and capture the end of your winding wire into the jaws of the chuck like so.


Working at low speed, wind the lighter wire around the music wire to form a tight spring. Hold the wire with the work glove to prevent wire burn and don’t rush the process; concentrate on keeping a nice, even, spring.
If you want to create a longer spring, that’s fine, just use a piece of steel wire the same size as your brass for your mandrel. It needs to be the same gauge to make sure the inside diameter of your spring is the size of your brass shaft or there will be tears later.
Step Three:
As before, cut your spring apart into four or three-round increments as desired. A finer set of nippers is helpful for this, but you could theoretically use the same pair of cutters for all cutting operations.
Caution: Cover the cut-off with your hand or work inside an open Ziploc bag to prevent your offcuts from flying across the room or hitting you in the eye. (You are wearing appropriate eye protection, right?)
Step Four:
Place one end of each shaft on your bench block or the edge of your anvil and flatten it just a bit as shown, forming a flat ‘tag’ which will be wider than the rest of the shaft.

Step Five:
Slide a segment of spring onto each of your shafts and gently force them over the wider, flattened, end. It should feel like a tight, secure, fit.
If needed, you can drill a hole the size of your shaft in a piece of wood, place the bit of spring over the hole, and lightly tap the shaft through the spring and through the piece of wood until your tag is inside the spring.


Repeat as many times as necessary.
Step six (Optional):
Watch this video about brazing brass and then do likewise to secure the heads in place and conform to Henry’s Pin Law.

Honestly, if you’re crimping, I don’t think soldering is as necessary as Old Coppernose did, but I wouldn’t want to put you on the outs with the Tudor fuzz.
Step seven:
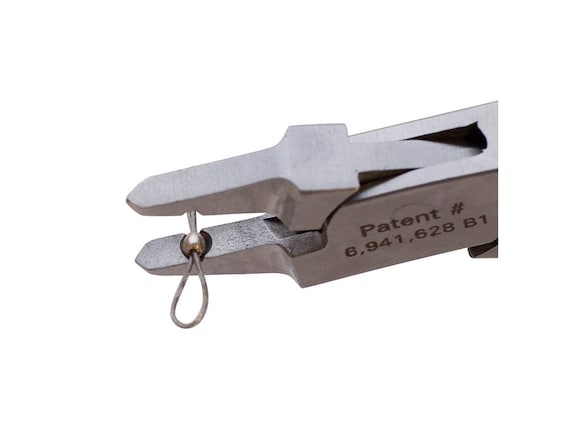
Confession: I don’t (yet) own a pair of crimping pliers, but a lot of modern pinmakers swear by them and I really should get a pair. They make a beautiful little ball end and aren’t as clumsy or random as my cold-forging hack using the two bolts. You can easily find and purchase them at craft stores and online, assuming you’re not as lazy as I am.
This particular pair of crimping pliers was recommended by another pinmaking blogger whose blog I’ve regrettably lost track of. So if it was you, please comment so I can link back to your tutorial.
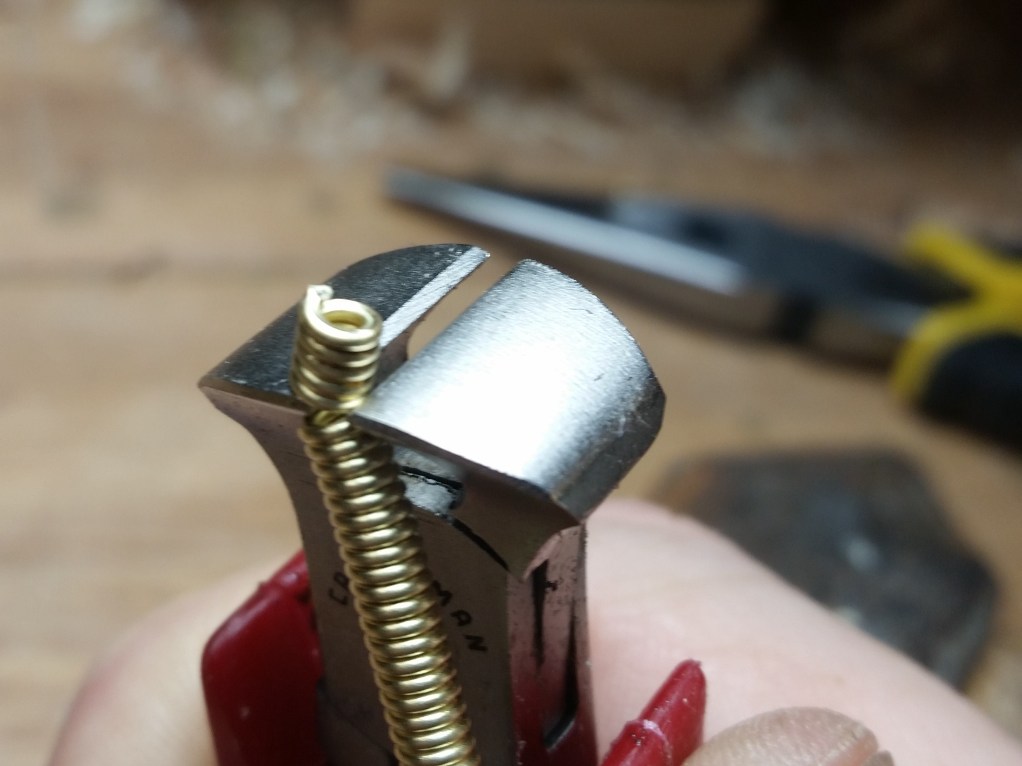
Compress the spring into place with your crimping pliers. Alternatively, you can make a cold-forging die and use a hammer or arbor press to compress the brass head onto the shaft.
Step eight:
There are multiple ways to approach sharpening. You can use a belt sander and hold the pin against it or you can spin the pin and hold the sandpaper against the pin. Spinning the pin gives you the most consistent taper and the sharpest pin, so that’s what I went for here. For lighter, smaller gages of wire, the belt sander approach might be better if you have one available to you.
Chuck the head of the pins into your drill, being careful to pass the newly-formed head into the space behind the jaws of the chuck. (You should be able to feel it when you’re past them.)


This is when you’re going to be rewarded if you chose a drill that plugs into a wall. Battery-powered drills are perfectly fine for this, but you’re going to need to have a charged battery handy because you will be wearing them out.
Note: If you have a drill press handy, use it. I switched to a drill press almost immediately after taking these first pictures. It’s the same thing, just turned 90 degrees.
Step nine:
Sharpen the pins using the spin of the pin against successively finer grits of sandpaper starting with 80 for bulk stock removal, then fine tune with 120 and then 220.
Hold the sandpaper in the leather work glove because this will produce heat and keep the sandpaper moving against the spinning metal to prevent the grit from creating deep scratches that will need to be ground out later. This will take a little practice, but you’ll get the hang of it and be moving them out in no time. Each point can be fine-tuned (out of the chuck) with your file to correct any misshapen parts, though slightly misshapen pins are a nice period touch.


The optional wet/dry sandpaper can be used at the end to give the brass a higher polish, which would be most important for pinning into finer cloth.
EDIT: You can get faster results by spinning the pin against a belt sander or disc sander so that both are moving. This is inarguably faster, but also easier to catch the tip in the sandpaper, which is bad and could hurt you. Try not to do that.
– Scott

Step ten:
Work harden each pin by rolling the shaft briefly between a steel bench block and another steel surface (another bench block, the face of an anvil, the iron or steel bed of any large power tool, etcetera.)
I couldn’t figure out a good way to take a picture of this, but really, you’re just rolling the shaft between two pieces of steel, so that shouldn’t need much illustration. This also works to straighten bent or curved pins later if you need it.
Repeat as many times as you need pins.
At this point, I need to tell you something that’s very important… that took longer than sharpening them with a file on a pinner’s bone. At least it did for me.
With the important caveat that someone with more skills/practice at brass or metalworking might well get the job done faster than I, it’s important to realize that for me, the manual method was faster than the more automated method. Maybe starting with the file and then refining the taper with the drill and the sandpaper? I don’t know, but I encourage you to experiment and find your own best method and let me know what you figure out.
As always: Your Mileage May Vary.
– Scott

Thank you for this! It answered several questions I had, and I was able to make several this weekend at the colonial campout.
LikeLike